
If your Nintendo Switch is broken or you’ve bought a new one, you probably need to transfer your game saves, screenshots, and other saved videos. Here are several methods to do so.

You have decided to change Nintendo Switch for one reason or another? But what will become your game save data accumulated over the years? And what about your screenshots and recorded videos that you would like to keep?
There are several ways to transfer Nintendo Switch save data from your old console to your new console, depending on the specific data you want to move and the options available to you. Let’s check each method.
How do you transfer your save data to a nearby Nintendo Switch console?
Transfer of save data and user information can be done locally, but you can only transfer data for one user at a time. So, if you need to transfer your entire family’s data consisting of four profiles, you will have to repeat this process four times.
To get started, you’ll need to have your old and new Nintendo Switch consoles in front of you and have them charged, updated, and connected to your Wi-Fi network.
On your current console:
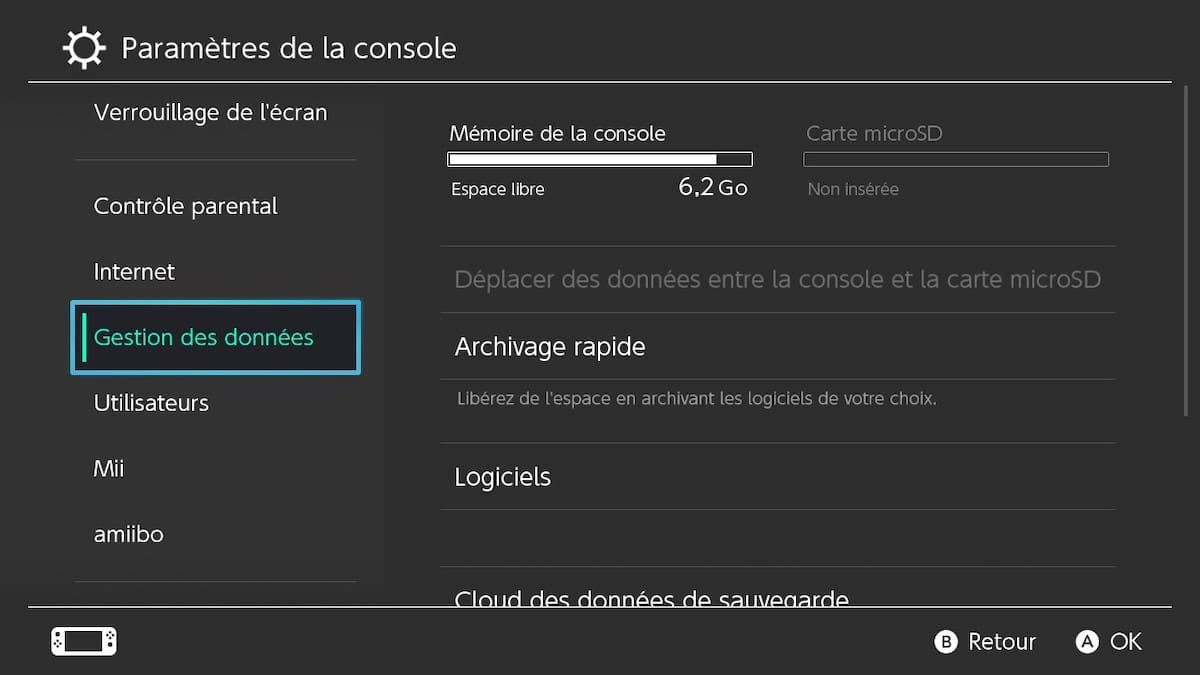
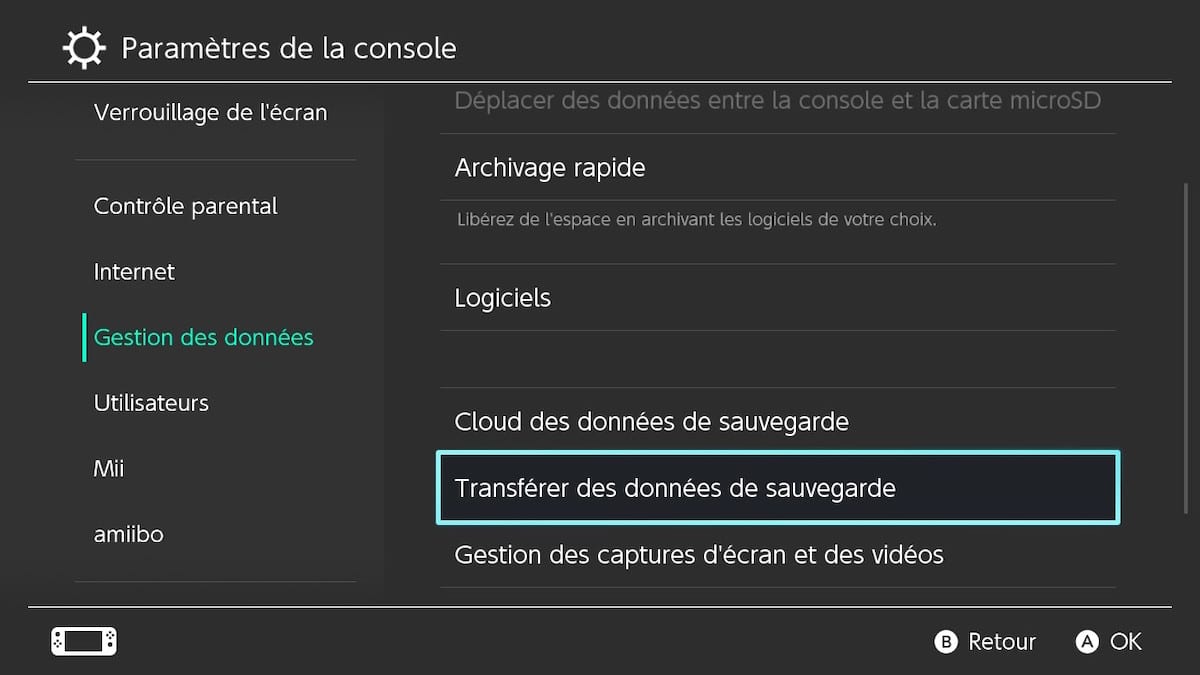
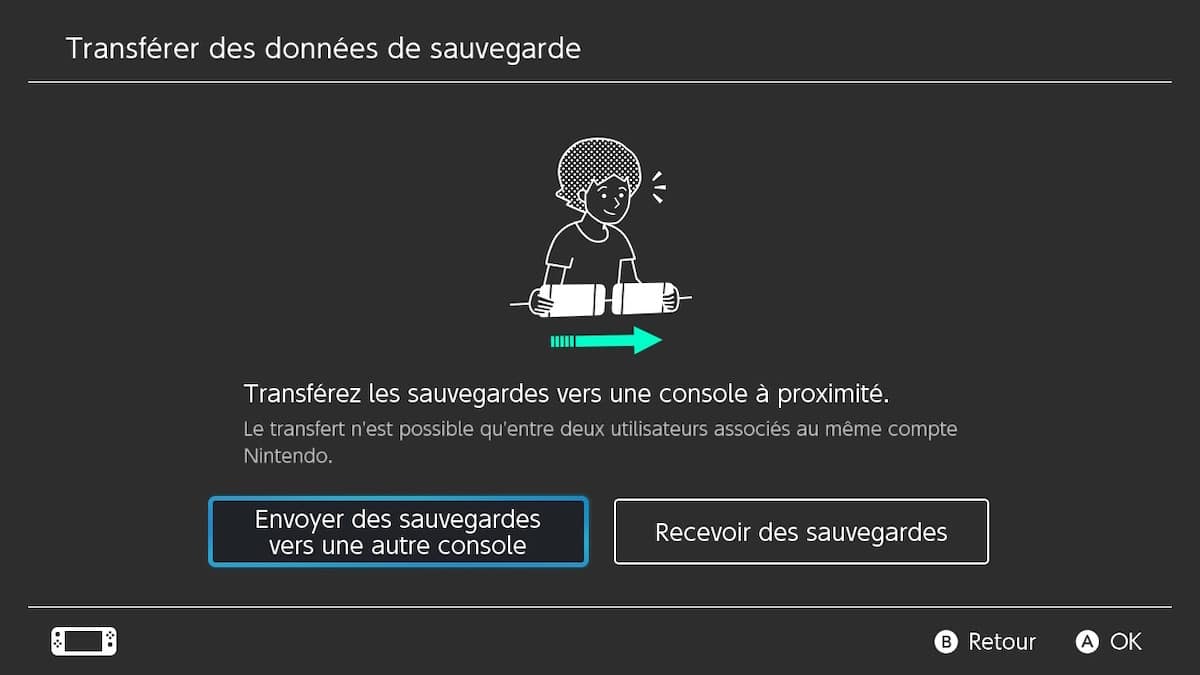
- From the HOME Menu, select System Settings > Data Management > Transfer Your Save Data.

- Select Send save data to another console, then select the user whose save data file you want to transfer.
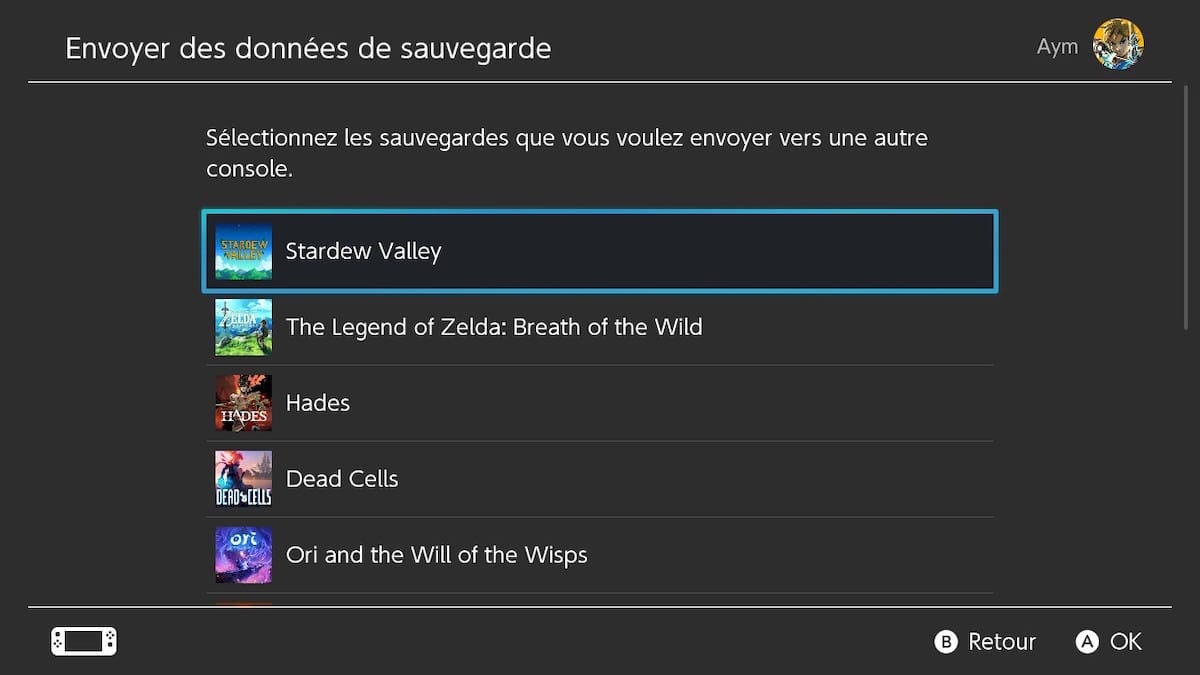
- Select the save data file for the software title you wish to send to another console.
- Select Send Save Data.
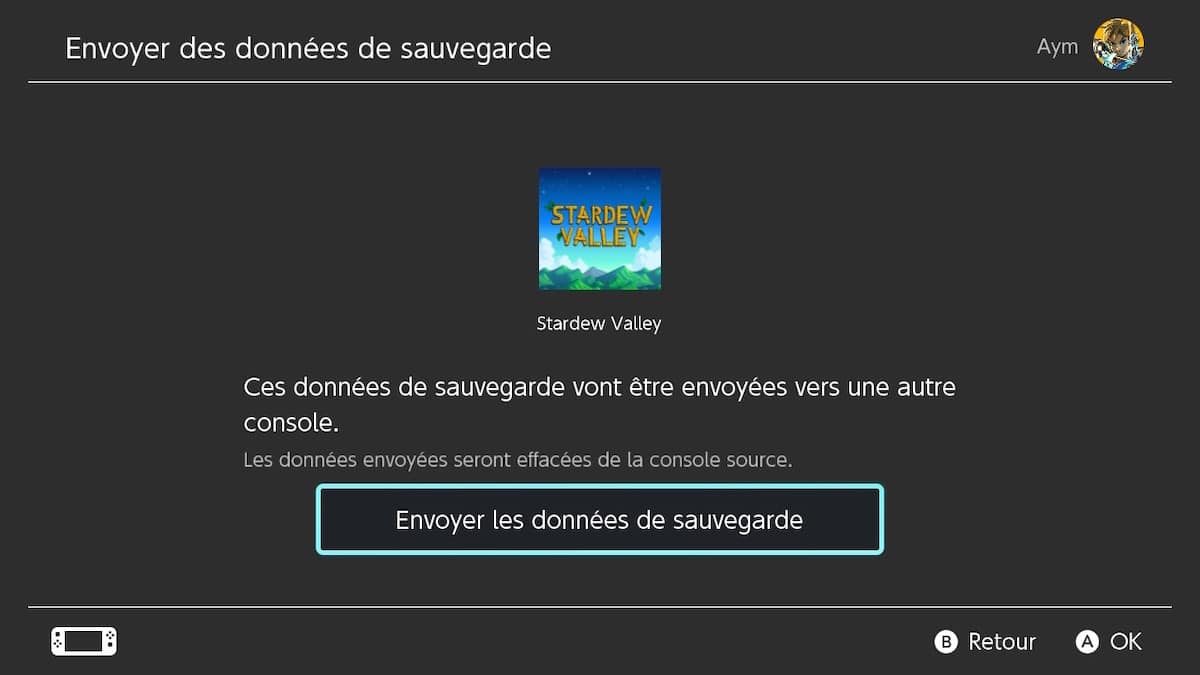
WARNING : Once sent, the save data file will be deleted from the source console.
On the target console:
- From the HOME Menu, select System Settings > Data Management > Transfer Your Save Data.
- Select Receive Save Data and place the two consoles next to each other.
- If there is existing save data for the same software on the target console, you can either cancel the transfer or select “Overwrite Save Data” to continue. Keep in mind that once deleted, overwritten save data cannot be recovered.
- When the save data transfer is complete, select “OK”. You can now resume your game on the target console.
How do I transfer save data via Nintendo Switch Online?
If you pay for a Nintendo Switch Online subscription, your games are automatically configured to back up data to the cloud. So, if you’re upgrading from the Switch Lite to the original Nintendo Switch or the Nintendo Switch (OLED), moving game data is an extremely easy process.
As long as you haven’t changed any settings, your old Nintendo Switch Online account will likely automatically back up your save data. However, you can verify this by going to Console Settings > Data Management > Save Data Cloud > and making sure the Automatically Back Up Save Data option is selected.
- On your new Nintendo Switch console, sign in to your Nintendo Account and make sure the Automatically save save data option is enabled.
- Install the game. Once on the game icon, click + > Save Data Cloud > Download Save Data.
- Alternatively, you can do this from System Settings > Data Management > Save Data Cloud.
If you plan to keep both consoles and play games on both, just make sure each console has the Automatically back up save data option enabled. Then you can pick up where you left off on either console.
How to Transfer Data from SD Card to Nintendo Switch?
If you are looking to completely move all your old Nintendo Switch data to a new Nintendo Switch (game save data, screenshots, recorded videos), transfer via microSD is recommended. To do this you will need your original Nintendo Switch with its original microSD card, from a Windows computer with a microSD card reader (or a separate reader) and your new Switch paired with a new microSD card.
Nintendo specifically states that this process may not be able to run properly in operating systems other than Windows, so it might not work on macOS. The company also warns that you should only use one microSD with one system and be careful not to swap microSD cards between systems.
To read: Nintendo Switch: how to get your Joy-Con repaired for free?
To get started, remove the original microSD card from your Nintendo Switch and insert it into your computer’s microSD card slot or a microSD card reader connected to your computer. If your computer has an SD card slot but no microSD card slot, you will need to purchase a microSD to SD card adapter before you begin.
Using Windows Explorer, locate and navigate to the microSD card, highlight the entire folder containing your data, and drag it to the desktop. Do not delete or modify any data on the original microSD card until you are sure that the transfer was successful and the new microSD card is working perfectly. Next, properly eject the microSD card from your old Switch and insert the second microSD card for your new Switch.
Find and navigate to the new microSD card through Windows Explorer, then drag data from your desktop to the new microSD card. Properly eject the second microSD card and insert it into your new Switch. Some software update data may not be transferred, but may be redownloaded from Nintendo eShop.
How do I move an Animal Crossing: New Horizons save?
If you have played Animal Crossing: New Horizons and want to transfer your save data to a new Nintendo Switch, there’s a separate process to follow. You will need to download the Island Transfer Tool from the eShop and follow its instructions.
- Download the Island Transfer Tool from both your source console’s eShop and your target console, launch it on the source console, and press A.
- Tap Continue.
- The app will notify you to plug both consoles into a charger. Once you’ve done that, tap OK.
- Tap Let’s get started.
- Press Source.
- Wait for the app to locate the island data you want to transfer. Once done, tap Yes.
- You will see a message telling you to wait until the other system prompts you.
- Open the Island Transfer Tool on the target console and follow the same prompts as before until you reach the screen that asks you to confirm if this is the target or source console. Tap Target.
- Press Continue on the source console.
- Press Continue on the target console. Consoles will now start searching for each other.
- Once they have located themselves, a message will appear on the target console indicating the name of the island. Confirm this is the island data you want to transfer and tap Continue.
- On the source console, confirm that the name of the console you want to transfer your island to is correct, then press Continue.
- A final message will appear on both consoles confirming the transfer. Tap Continue on both consoles.
- Once the data has been transferred, close Island Transfer Tool on the target console and launch the game.
- Press Next.
- The game will ask you if you want to link existing data or start from scratch with a new island. Tap Existing data.
- Tap View Data to display a list of available residents.
- Select your villagers.
- Press Yes.
- Press Close.